
Jezz Smith, a jouster from New Zealand, also makes saddles based on historical designs. Here are a series of pictures, taken by him, showing the process of making a historical saddle. Jezz Smith's saddles are very similar to the saddles made by Joram van Essen and Wouter Nicolai that were discussed in the two part article, "Re-Creating Medieval and Renaissance Saddles" written by Arne Koets.
There are actually two different saddles shown in various stages of creation. However, the saddles are similar enough that, for the purpose of displaying the process of making a historical saddle, it doesn't matter that pictures from the making of two different saddles are used.
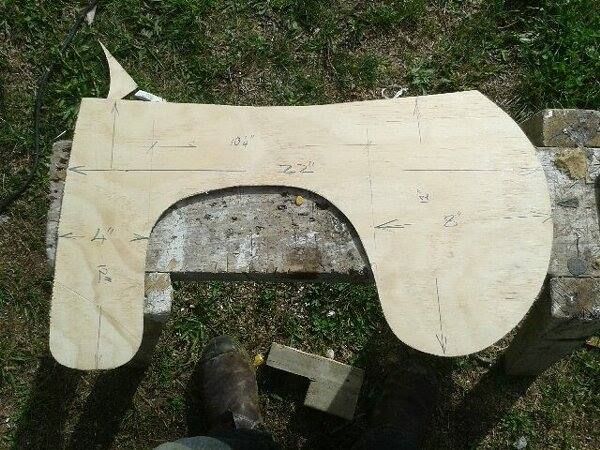
The template for the side bars of the saddle. The side bars are the part of the saddle that actually rests on the sides of the horse.(photo by Jezz Smith)
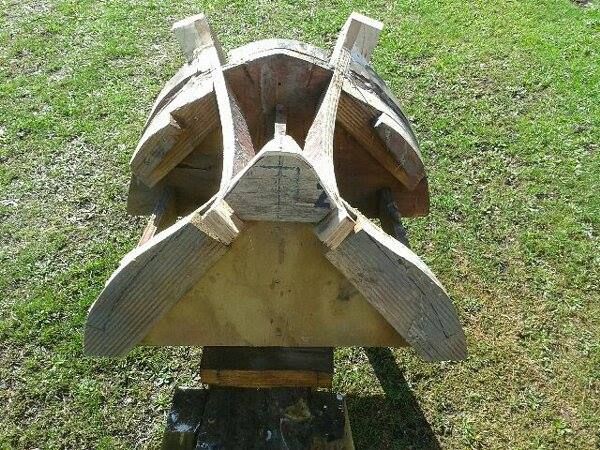
The laminating frame is used to create the curves necessary for the saddle to fit the horse's back.(photo by Jezz Smith)
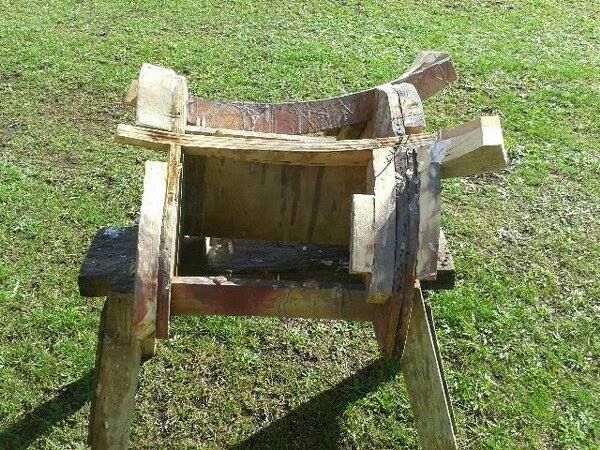
A side view of the laminating frame(photo by Jezz Smith)
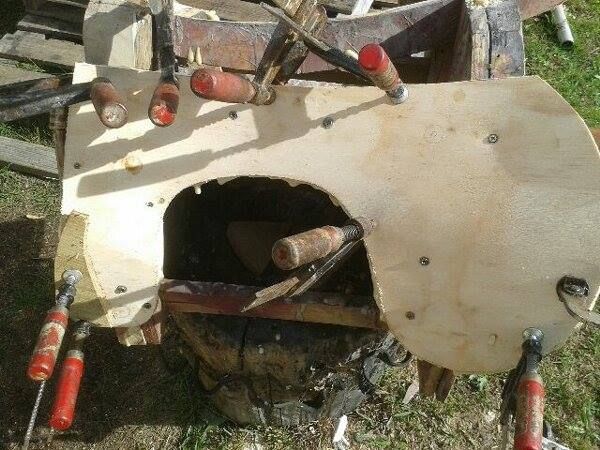
The side bar is clamped(and screwed when you run out of clamps) to the laminating frame. The screw holes will be filled in later.(photo by Jezz Smith)
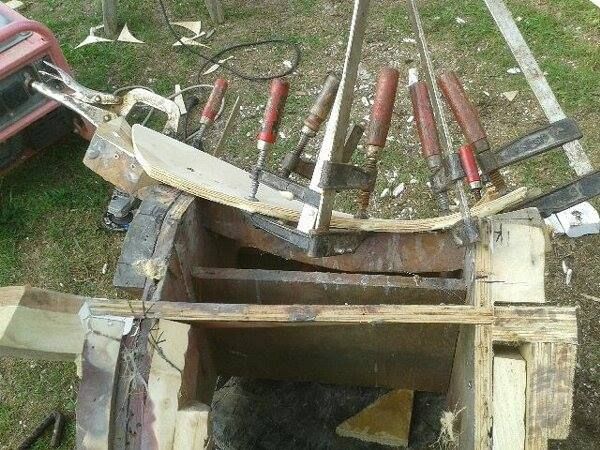
Four layers of 3mm plywood glued with polycarbonate laminating glue(photo by Jezz Smith)
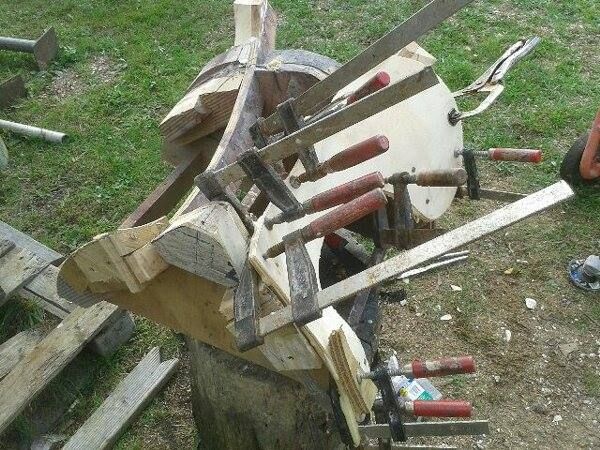
You can see where extra blocking can be added to the laminating frame to alter it to fit different horses.(photo by Jezz Smith)
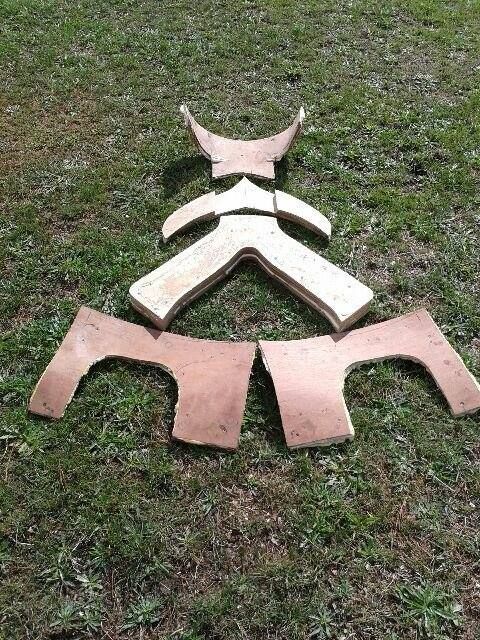
From top to bottom: The pieces used to create the cantle(back), pommel(front) and side bars of the saddle(photo by Jezz Smith)
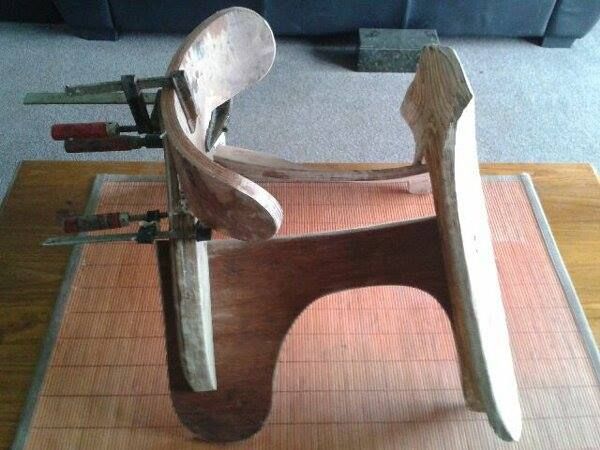
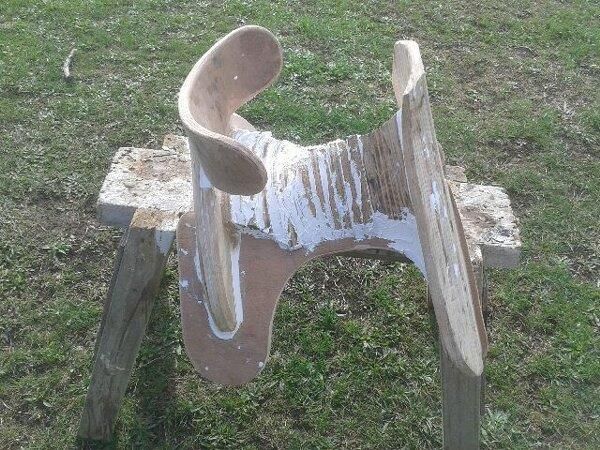
The pieces are temporarily glued together for a fitting(photo by Jezz Smith)
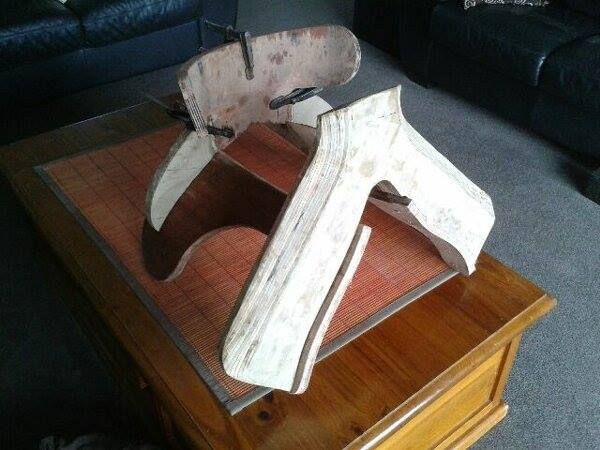
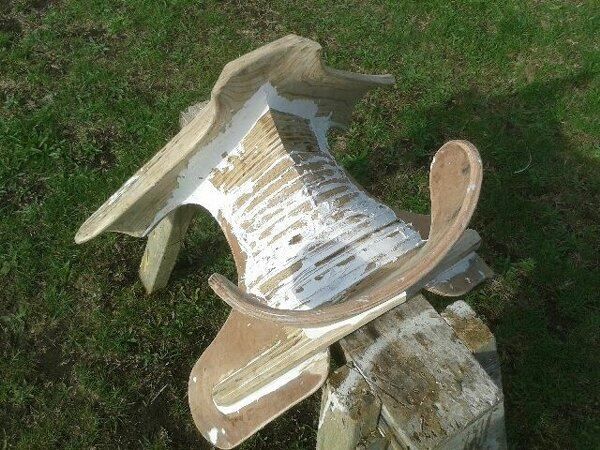
Another view of the pieces clamped and glued together(photo by Jezz Smith)
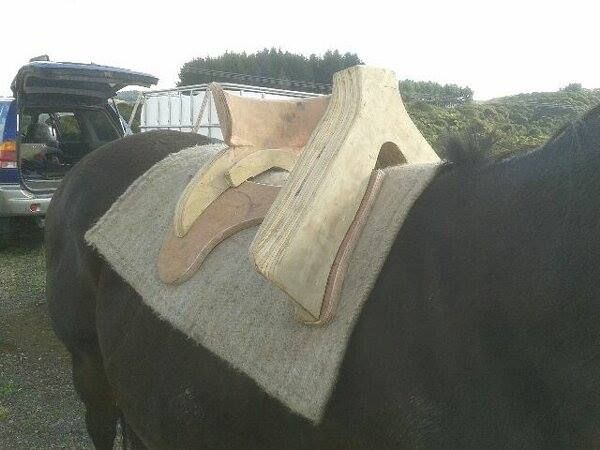
Checking to make sure the saddle fits the horse(photo by Jezz Smith)
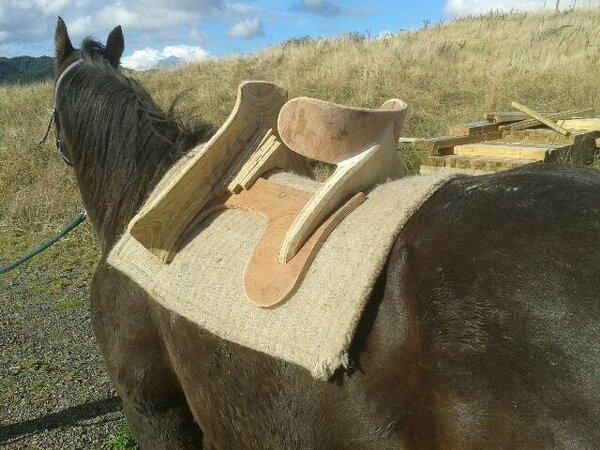
Rear view of the saddle on the horse(photo by Jezz Smith)
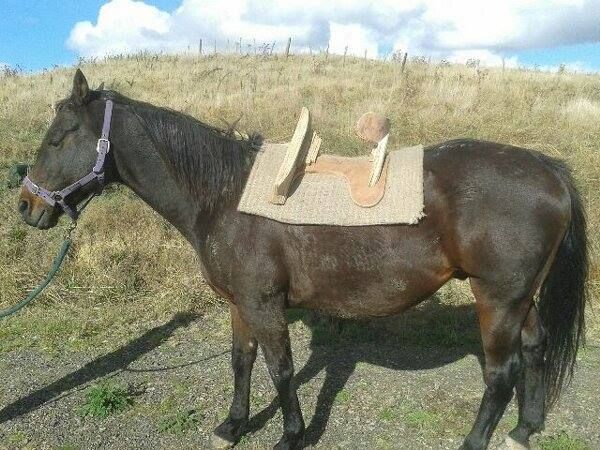
Side view of the saddle on the horse(photo by Jezz Smith)
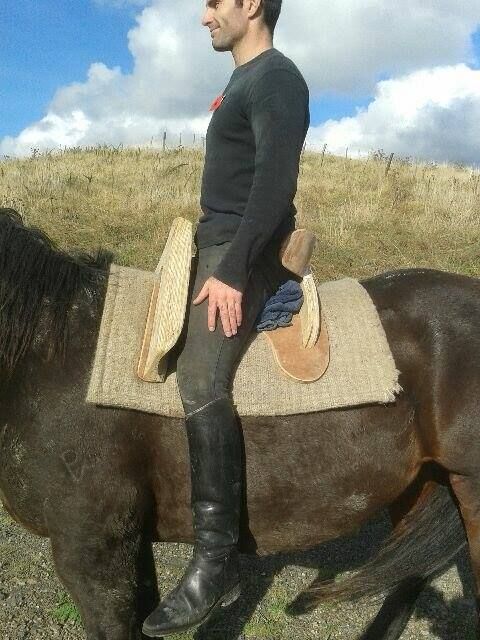
Checking to see if the saddle fits the rider,Simon Paul Tennant. According to Jezz, the cantle needed to be moved forward about an inch.(photo by Jezz Smith)
After adjusting the cantle, the pommel and cantle are permanently glued into place, and the pieces making up the seat are added(photo by Jezz Smith)
A top view of the seat pieces glued into place(photo by Jezz Smith)
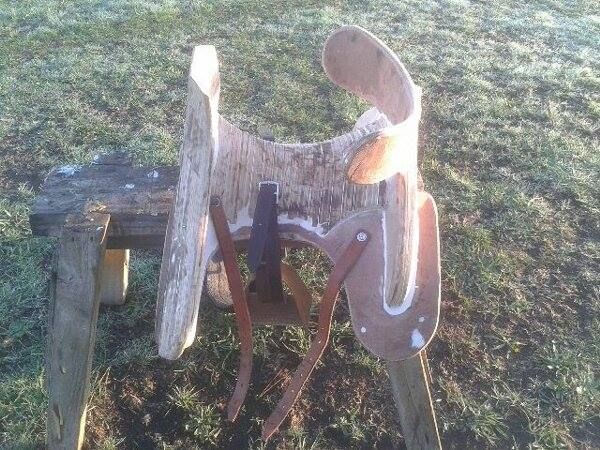
After the glue dries, the seat pieces are sanded into a smooth shape, and strap placement is checked(photo by Jezz Smith)
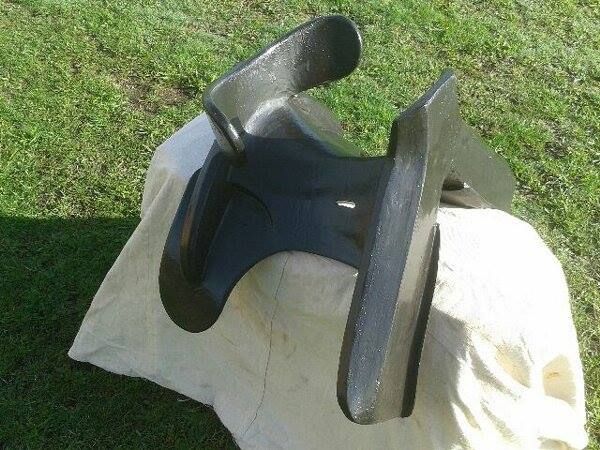
The saddle is covered in black resin(photo by Jezz Smith)
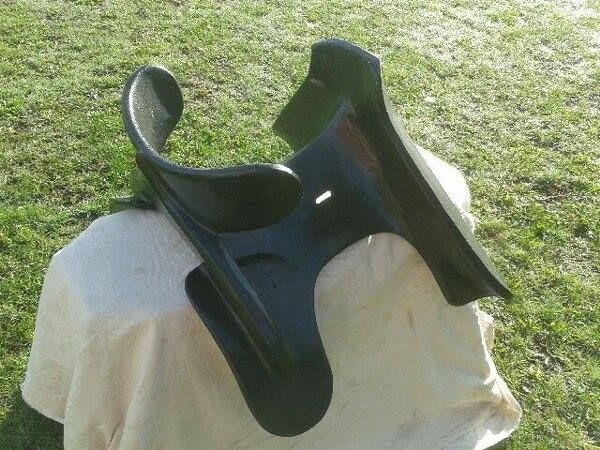
Another view of the black resin covered saddle(photo by Jezz Smith)
According to Jezz and others who use this style of saddle, padding for the seat is not necessary, though the seat and other parts of the saddle can be covered in leather. Decoration can also be added to suit the owner of the saddle.
Related articles:
Re-Creating Medieval and Renaissance Saddles: Part One
Re-Creating Medieval and Renaissance Saddles: Part Two
An Interview with Joram van Essen: Grand Champion of "The Grand Tournament in Sankt Wendel"
There are actually two different saddles shown in various stages of creation. However, the saddles are similar enough that, for the purpose of displaying the process of making a historical saddle, it doesn't matter that pictures from the making of two different saddles are used.
The template for the side bars of the saddle. The side bars are the part of the saddle that actually rests on the sides of the horse.(photo by Jezz Smith)
The laminating frame is used to create the curves necessary for the saddle to fit the horse's back.(photo by Jezz Smith)
A side view of the laminating frame(photo by Jezz Smith)
The side bar is clamped(and screwed when you run out of clamps) to the laminating frame. The screw holes will be filled in later.(photo by Jezz Smith)
Four layers of 3mm plywood glued with polycarbonate laminating glue(photo by Jezz Smith)
You can see where extra blocking can be added to the laminating frame to alter it to fit different horses.(photo by Jezz Smith)
From top to bottom: The pieces used to create the cantle(back), pommel(front) and side bars of the saddle(photo by Jezz Smith)
The pieces are temporarily glued together for a fitting(photo by Jezz Smith)
Another view of the pieces clamped and glued together(photo by Jezz Smith)
Checking to make sure the saddle fits the horse(photo by Jezz Smith)
Rear view of the saddle on the horse(photo by Jezz Smith)
Side view of the saddle on the horse(photo by Jezz Smith)
Checking to see if the saddle fits the rider,Simon Paul Tennant. According to Jezz, the cantle needed to be moved forward about an inch.(photo by Jezz Smith)
After adjusting the cantle, the pommel and cantle are permanently glued into place, and the pieces making up the seat are added(photo by Jezz Smith)
A top view of the seat pieces glued into place(photo by Jezz Smith)
After the glue dries, the seat pieces are sanded into a smooth shape, and strap placement is checked(photo by Jezz Smith)
The saddle is covered in black resin(photo by Jezz Smith)
Another view of the black resin covered saddle(photo by Jezz Smith)
According to Jezz and others who use this style of saddle, padding for the seat is not necessary, though the seat and other parts of the saddle can be covered in leather. Decoration can also be added to suit the owner of the saddle.
Related articles:
Re-Creating Medieval and Renaissance Saddles: Part One
Re-Creating Medieval and Renaissance Saddles: Part Two
An Interview with Joram van Essen: Grand Champion of "The Grand Tournament in Sankt Wendel"
No comments:
Post a Comment